Well if this works out, you should have a lightweight inside out shirt... or an outside in... whatever...
AS ALWAYS, READ THROUGH ENTIRE PAGE FIRST
Let's set our machine up properly:
- We want 8-10 stitches per inch or ~4 stitches per cm.
- make sure you have identical thickness thread in the bobbin
- Your spool and bobbin tensions should be identical (practice on scrap first!)
- Your tension is to tight if the material bunches. Tension to slack if
threads are too noticable when materials are firmly pulled away from
each other.
If you are not using a sewing machine (...and i applaud your audacity), a saddle stitch will work the best. 2 needles and 2 threads. Knot your end after bar-tacking.
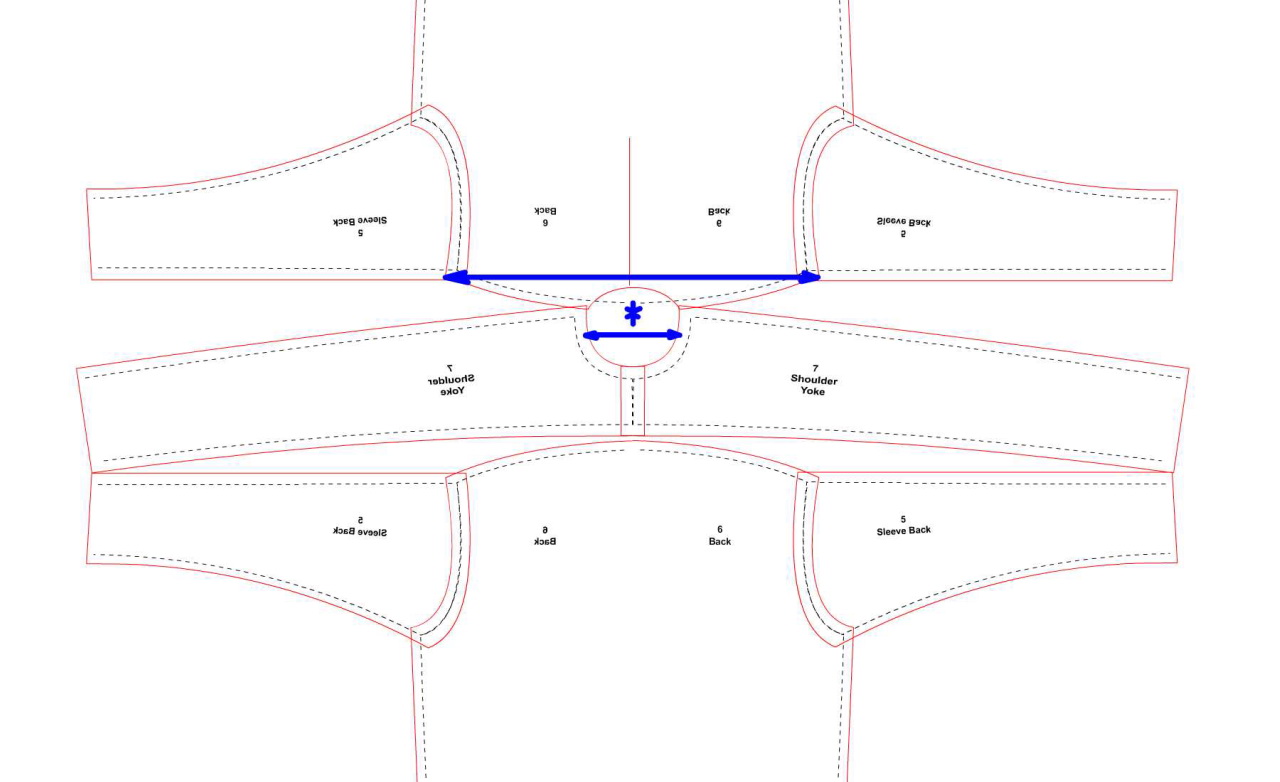
Lay your pieces out as shown. It's important to remember that the liner will be sewn exactly opposite of the wool shell.
This means that our finished look will be on the inside when we are
wearing the anorak (and the visible seams will be facing away from us
when we are wearing it... but still unseen as they will be hidden by
the shell!). That leaves us to figure which surface of the liner we
want against our skin/underlayers. After choosing sides and laying out
as shown above, we can begin stitching. Start by sewing the back
sleeves to the back panel and then stitching the front sleeves to the
front panel.
If you haven't already sewn the yoke halves together, sew them together as shown above. You should now have 3 pieces.
TIPS:
- When you sew panels together, get in the habit of starting from the
same point. Example - If you start from the top of the back panel on
the left back sleeve, start from the top of the back panel on the right
back sleeve (and not from the armpit). The same applies to the front
panel. If we keep a constant flow direction, mistakes we find later can
be fixed from one area instead of many.
- Always bar-tack start and finish seams. Sew about 6-8 stitches
forward. Hit reverse and sew 6-8 stitches back. Continue with your
stitch. when you get to the end, reverse 6-8 stitches, and then go
through 6-8 stitches to the end of the seam.
As shown, we are going to want to sew 5/8" (nominal 1/2") in from the
edge of all of our pieces. The sides facing together (those you can't
physically see) are the sides which will be closest to your body.
We are going to want to connect all the panels together with exception
to the sides of the body panels. Start from the neckline, on the front
body panel, and sew the yoke OUTWARD towards the cuff on the front
panel. Do the same thing from the neckline on the other side.
On the back panel, start at the yoke seam (in the center) and sew
towards the cuff. Do the same from the center and sew towards the cuff
on the other side.
Why do we start at the center and work outwards?
This pattern is somewhat differentially cut. This means that sometimes
straight panel edges are frequently stitched to curved panel edges
(when laying flat). Had we started from the cuff sides, you would have
a bit of leftover/unmatched panel at one end or the other. When you
look at your sewn together 'serape' you'll notice that the cuffs areas
are not perfectly matched. It's OK. we are going to trim these down and
they'll be hidden anyway.
TIP:
- You may want to change the length of the sleeve to make it shorter.
When stitching towards terminations (cuffs, body panel hem) it's a good
habit to add a few extra bar tacks, spaced a few inches apart, at the
end of your stitch runs. So, the last 4-5 inches of your run will have 2-3 bar-tacks spaced about an inch apart.
You now have what looks like am unfinished inside out poncho looking thing.
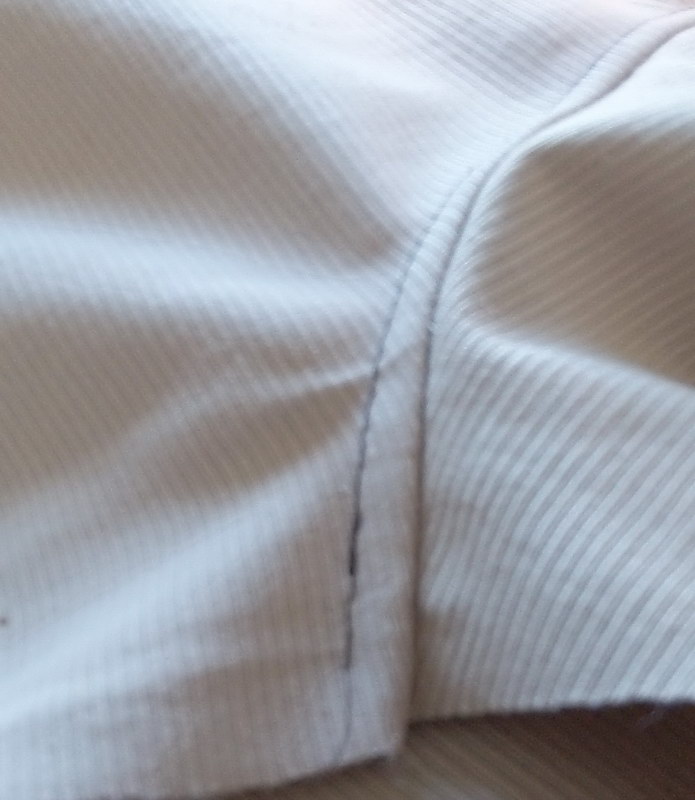
At your discretion, You now have the option to topstitch (or is it
bottomstitch with liners?) all of the liner seams EXCEPT the underside
of the arms and the sides of the body panels (You haven't sewn these
together yet have you?). Above is a topstitch on the left side with a
1/4" width. It's the goto standard for almost every pattern here.
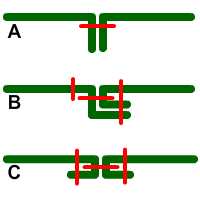
A - straight stitch
B - Single topstitch - folded to the right (ignore the little red stitch on the left)
C - Double topstitch - Decorative only, adds no strength
We will always use A and B
You will have a stronger liner if you top stitch, but more leftover thread if you don't.
I say topstitch ;)
Continuing along, you've got everything topstitched up (EXCEPT THE BODY SIDES AND UNDERARMS).
Let's do a little customizing. Put the 'poncho' on!
As it stands, the patterns for the arms leave a lot of room to play
with. They will be pretty loose. Not everyone is going to want cuffs
that allow your hands to slide into the opposite cuff (kinda like the
chinese kung-fu guy with his hands hidden within cuffs that butt up to
each other).
A good size cuff is one that has an inner diameter equal to the greatest circumference of your forearm.
So, while wearing the liner(with the seam allowance on the outside),
pinch the cuff ends together with your opposite hand, at the wrist, and
slide it up toward the largest part of your forearm. Give it a little
room for play. Note the AMOUNT OF EXCESS SEAM ALLOWANCE where you have
not sewn. This amount MINUS the 5/8" we need to leave on is how much we
can remove from the arm panels.
We want this to transition smoothly into the elbow area so we will taper our cut towards the elbow.
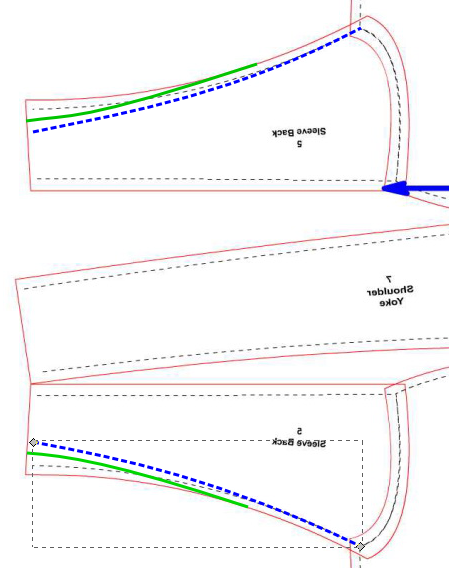
The green line represents our revised cut based on our forearm circumference. The blue dashed line
shows our new stitch line. Notice we have not changed/removed anything
near the armpit area! We'll end up with 2 small triangular curved
scraps. SAVE THESE. you can use them as a template for the shell arms!
TIP:
- Fold the arms together (as though you are going to sew them) and cut both arm pieces together.
Now let's throw a finish with the body panels and the underarms seams. Where are we going to start? Armpits! You really are getting the hang of this.
- Left side armpit to cuff
- Right side armpit to cuff
- Left side armpit to body hem
- Right side armpit to body hem
Remember those bar-tacks towards the ends of your runs!
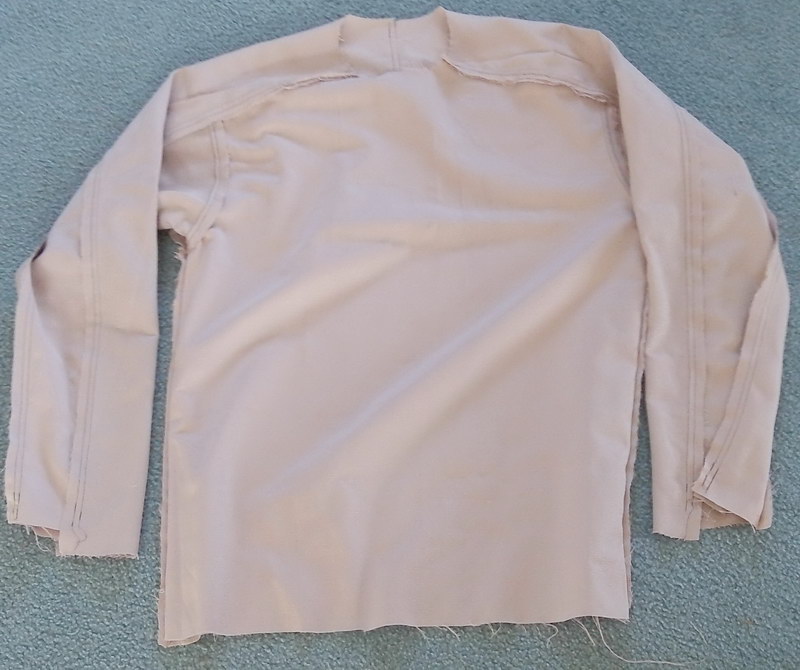
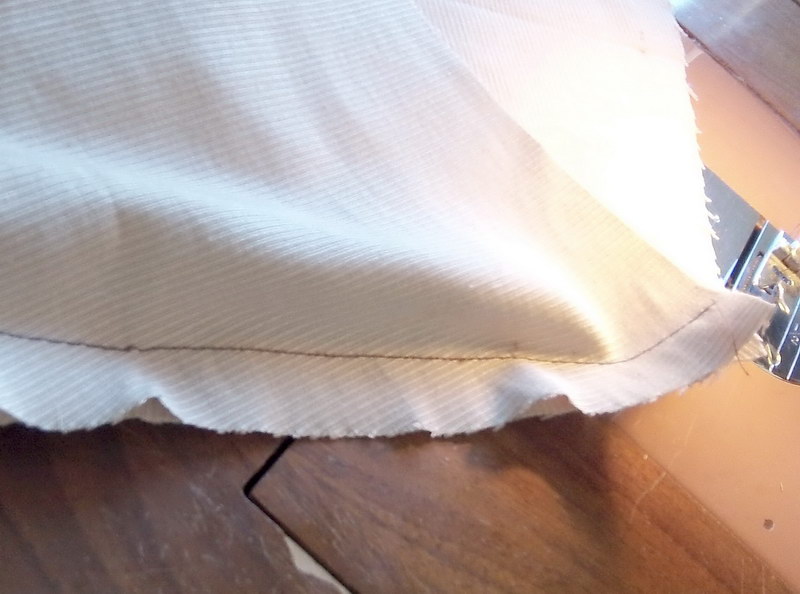
Shown with face that will be against the shell. Notice the uneven cuffs and the extra bar-tacks? All to be addressed shortly.
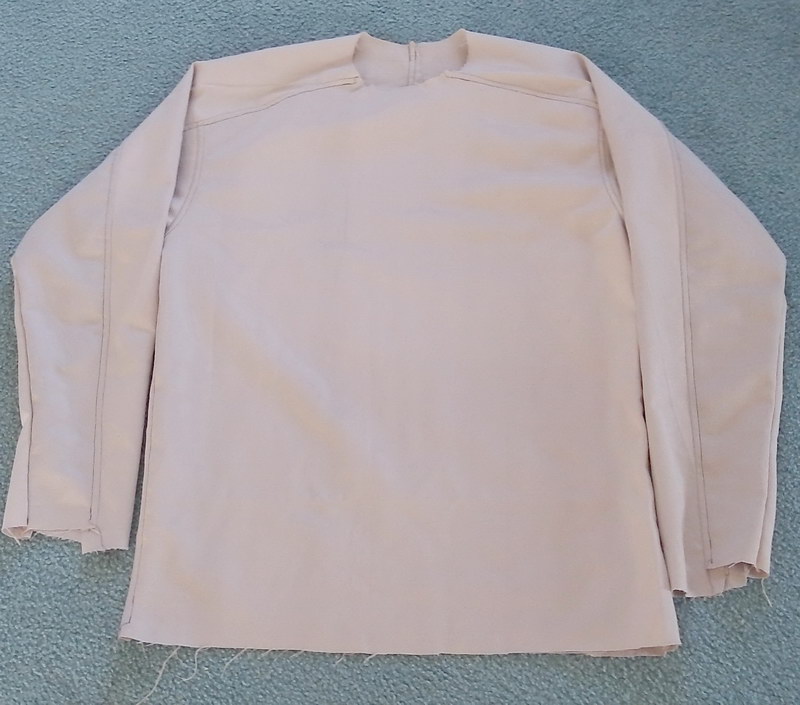
Shown inside out. This is the face you'll see on the inside of the finished piece.
All right, you've got the basics down...
It's time to start
Sewing the Shell >
______________________
MENU:
Jackets
and Pullovers
Hats and Headbands
Mittens
Bags and Cases
Sheaths and Knives
Miscellaneous
HOME
omnabashi@gmx.com
