When i started 're-designing' the collar i, once again,
neglected to take a bunch of pictures of the process. Please bear with
the illustrations as they're made up as needed.
If you can view 2 web pages at once, it would be a good idea to look at this page and the next page (jackets11.htm) at the same time. They both have interchangeable ideas.
Skip the snaps if you do not plan on adding a hood. I really recommend the hood option though. - - It's removable
- The snaps can open up idea's for many other option (cowls, etc.)
They can add a frankenstein look i suppose (when the hood isn't snapped
on)... don't know, never noticed. If your really anal about looks, you
could make some female snap tops made out of wood. Hell, you can paint an extra set of snap heads with enamel and then scratch designs into them.
Your creativity is limited only by your imagination... and if your
creativity is anywhere near the madness bouncing around in my head,
we'd have tritium filled lava lamps dangling off our necks.
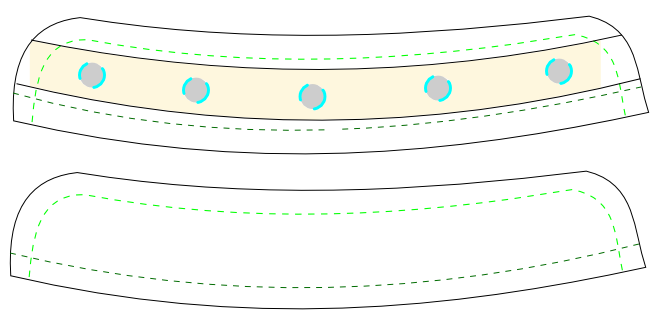
The TOP collar piece will be on the OUTSIDE of the jacket.
The BOTTOM piece will be on the INSIDE of the jacket.
- The Grey and Aqua circles represent the snaps
- Light Green Dashes are the final collar stitches
- Light Yellow is 3 oz. reinforcement leather (this will be hidden from view when the collar is sewn up)
- Dark Green Dashes are where the collar will be sewn into the neckline of the anorak.

Layers detail showing the Outer Collar piece from the side
A - Male portion of snap assembly. This will be on the outside of the collar.
B - Wool Collar piece
C - Leather strip
D - Rivet portion of Male snap assembly
It is not necessary to use 5 snaps, it's merely a suggestion based off
of using three. I used three and it works fine. I've used 5 and there
isn't much difference other than noticing that it can make up for
improper alignment of the snaps on the hood.
TIP:
- Where the snap rivet (D) goes through the wool, DO NOT use a hole punch or cut the wool fiber in any way. Use an awl (or a sharpened stick, nail set, something poke and somewhat sharp) to create a hole between the yarns.
Try not to go bigger than you must to get the rivet post through the
wool. This will make a stronger snap set, and prevent the wool from
unraveling during its lifespan.
so, let's...
- set all of our snaps - pay close attention that you don't set them to close to the future seams.
- cut the leather reinforcement strip long enough to work with all the snap sets.
- sew the collar pieces together WITH THE MALE SNAP PORTION ON THE INSIDE OF THE COLLAR PIECES.
- DO NOT sew the bottom (DARK GREEN DASHES) or you won't be able to
turn the collar inside out and have the snaps on the outside!

First look at the designs at the top of the page and then look back here.
Above is another excellent recommendation based off of a couple of
years testing. The first patterns on this page are original designs.
They work off of the basic principal that you will button the topmost
toggle only on rare occasions of extreme cold and wind (keep the neck
warm!). But the design does not let your chin move downward without binding a little on the corners where the collar comes together.
This became a little annoying and after further thought, i knew that
different neck sizes would experience different forms of discomfort
after extended periods of time.
To correct this...
- fold one of the collar pieces in half, end to end, and trim a little off of the corners to smooth out the corner.
- suggest 2" over and 3/4" down removal.
- you can cut straight or add a little curve to it
- once you've cut one piece, use it as a pattern to cut the other collar piece.
- adjust the positions of your snaps and leather strips to prevent interfering with future seams
Turn the collar inside out so that the snaps are visible and the
leather strip is now somewhat hidden. Our design will keep the cold
metal snaps from touching our neck.
We're not done with the collar yet. We are going to neaten it up a bit
by sewing a topstitch around the edge of the collar. This will be
visible from the outside and inside... so let's be neat about it.

We'll be sewing through 4 layers of wool once we turn it inside out and
begin sewing our collar topstitch. The topstitch will add a little
stiffening to the collar so that it will stand up. Start from either
side and sew ( The LIGHT GREEN dashes) around the perimeter but NOT the
DARK GREEN DASHES.
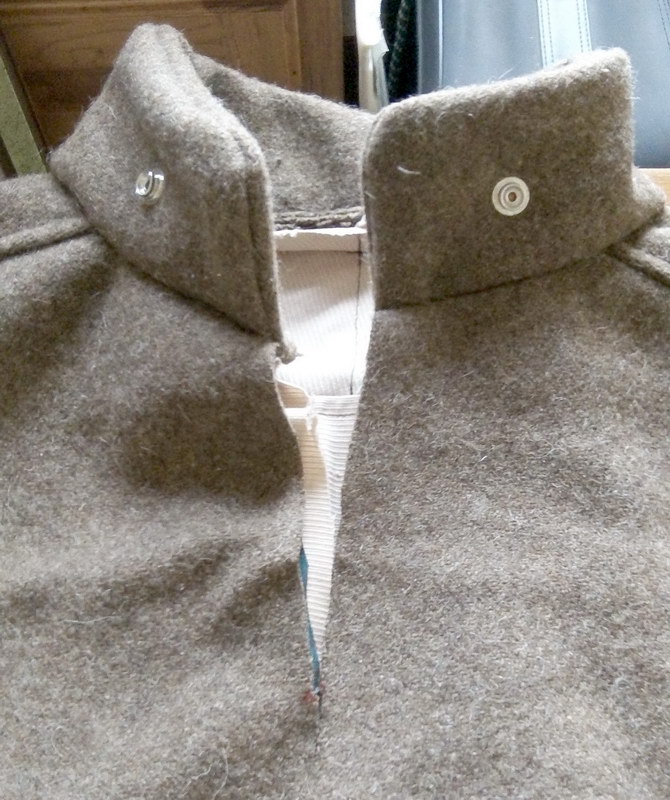
We should be able to sew our newly made collar onto the jacket at the
neckline now. In this photo, the topstitch of the collar, as we did in
the previous paragraph, was not finished. Well, it's easy to see that
it's much easier to sew the topstitch before, rather than after, we
attach the collar to the neck.
On paper, the collar should line up evenly on both sides of the
neckline where we cut our chest slit. This may or may not be the case
because of small variances in our sewing.
Let's...
- Add a tack at the neckline where the yoke seam is
- add a few more tacks at the front right and left sides of the collar and neckline junction.
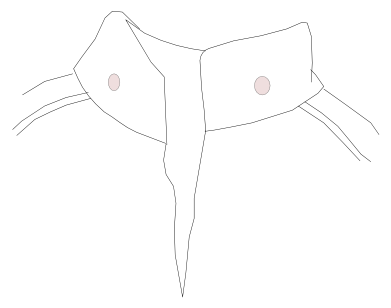
Does the collar look like you'll be able to sew the 2 together and not
have any overhang on the collar? If so, proceed to stitch the collar to
neck. If...
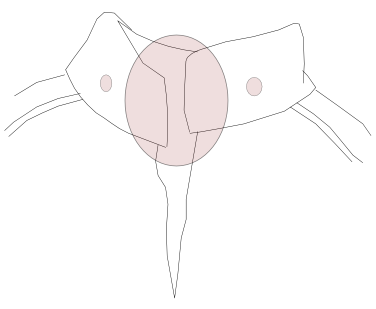
Your collar overhangs: You'll have to set it back
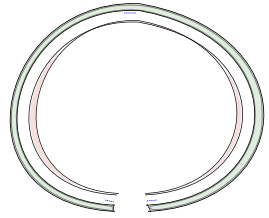
Looking down through the collar into the jacket. GREEN is the collar.
Pink is the neckline. The BLUE dashes are tacks. Put to tacks at the
neckline and collar ends so that it is flush as in the first collar
illustration. Next, add a tack to the collar and neckline at the yoke
seam near the back (single blue dash). The neckline will overhang as
shown by the pink area. It's OK. Trying to visualize this with the
actual fabric will not look the same... but the concept is there. So,
instead of sewing all of the edges lined up, the sides will be slightly
oblong. This does not affect the wear of the jacket.
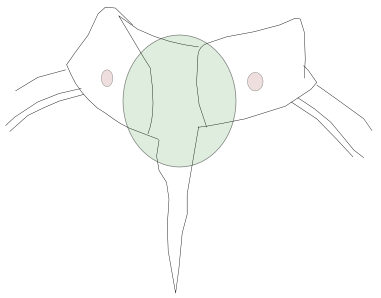
Your collar is short: you'll have to move it inward

You'll tack it in the same way as you would the preceding method. Only this time, instead of the pink representing the neckline of the jacket, it will represent the collar compensating by overshooting the edges.
This is fairly difficult because we are sewing through so many
layers... and we are still going to sew a strip of leather to cover it!
Take your time sewing through these thick materials combinations!
Another take on this would be to sew the hood directly to the neckline and forgo the collar altogether.
I thought about this... Deeply
The only problem with doing it this way is that the hood is permanently
attached and you are left carrying quite a bit of bulk around. If you
plan on using this coat only during the most
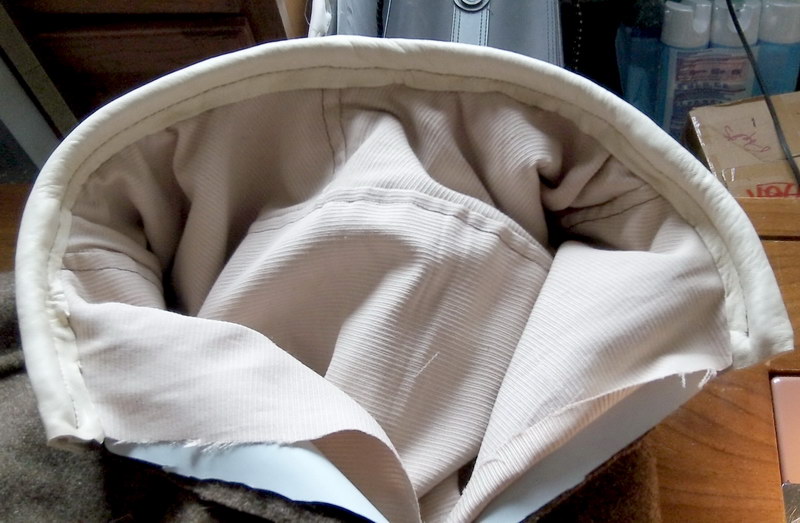
This stitch will redefine your idea of what hell really is.
It takes me about 30 minutes to sew through this with a machine. If you
know someone that makes shoes or works with leather, now is a good time
to stop by the liquor store, grab a bottle of wine and a few cigars
and head on over to their shop. Leave an inch or so of the leather to
overhang at the ends. We need to close the ends of the leather up so
that the wool seam allowance, from the collar and neckline, doesn't
show.
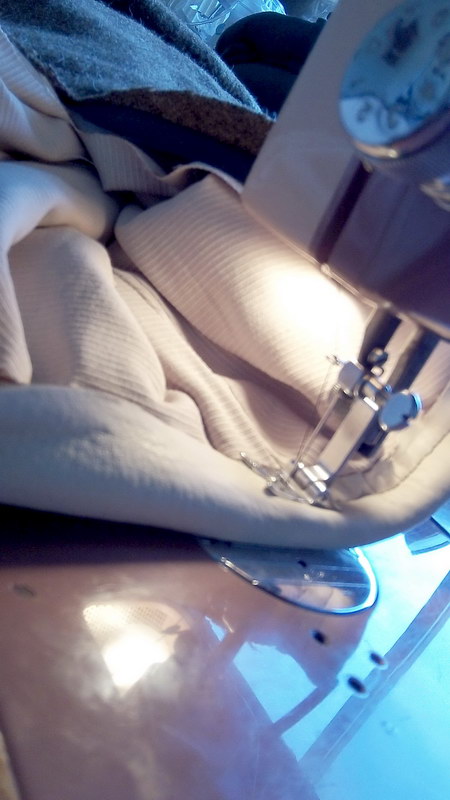
We're sewing through a minimum of 1/2" compressed material. Most
machines are not made to do this (it's even possible the material will
not go underneath the pressure foot). If you've got some serious time
on your hands, you could do this by hand. It's possible you could find
a different material to hide the seam, or just use a decorative
whipstitch to keep it all together. Either way, sedation is the best
way to start this stitch.
This page is getting to long.
Why don't we...
Work on the Chestline >
______________________
MENU:
Jackets
and Pullovers
Hats and Headbands
Mittens
Bags and Cases
Sheaths and Knives
Miscellaneous
HOME
omnabashi@gmx.com


