Let's see how our jacket panels are going to layout... Oh Yeah, READ THIS ENTIRE PAGE BEFORE YOU START CUTTING. I very much suggest that you make a mock up out of cheap material before you begin (cut out the patterns, place them on material, and use a common household stapler to fix them together)
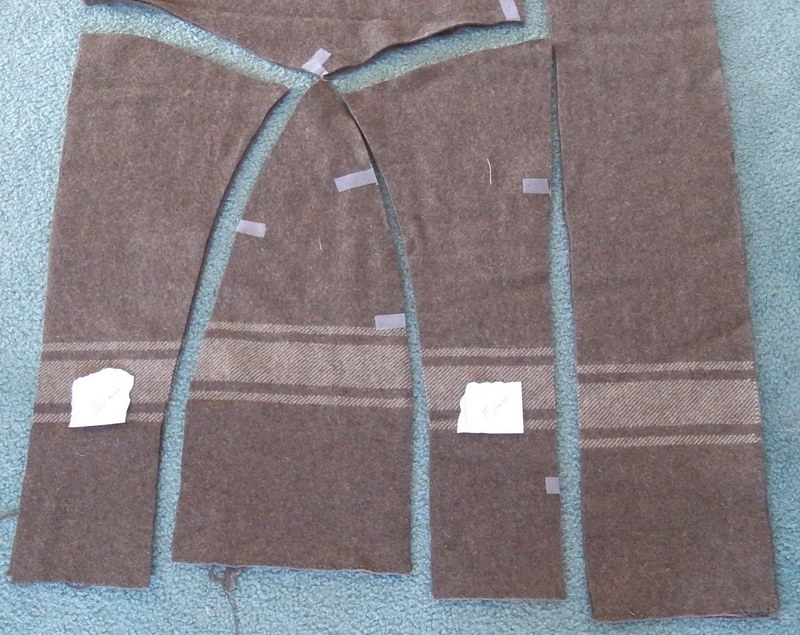
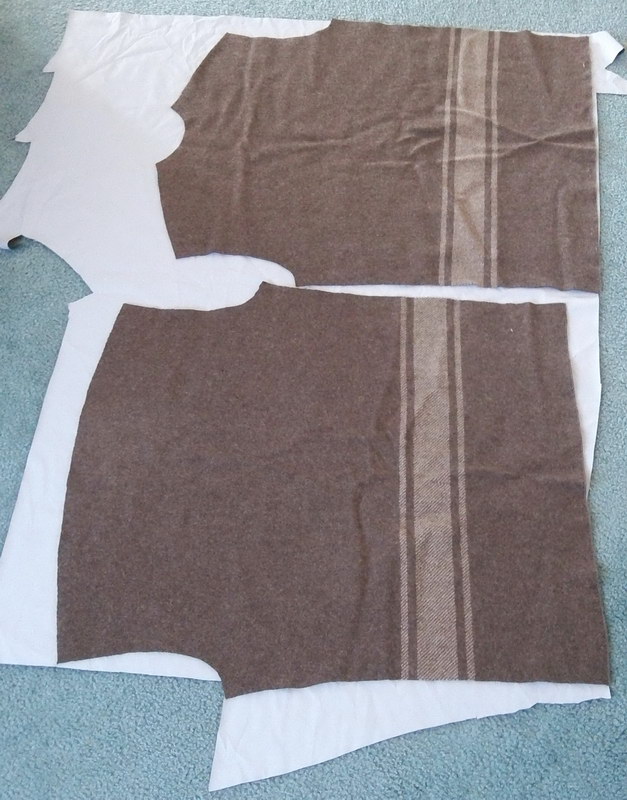
In this illustration shows the arm panels on the top and the body
panels on the bottom. I'm using an italian military wool blanket from
100% wool (hence the multi-banded stripes on the top and bottom of the illustration). You don't have to have the 100% wool version. a minimum of 80% wool works fine. Wash your blanket/wool yardage several times in warm water and let air dry
for a few days. This will increase the nap, shrink it to its lower
limit, and remove most of the smells that come from long term chemical
storage. If you are using wool material bought by the yard, make sure
that the loose cut ends are bound in some way. Duct tape or a quick
whip stitch around the edges will save you from ending up with a large
ball of yarn/cat toy.
You can also... fold the entire
blanket in half lengthwise and lay out your template pieces. In this
way, we can cut 2 panels at once which are mirror images of each
other... like so...

For the front and back panels, we can fold the material sides inward to
meet in the middle, lay down and tape our templates (using scotch tape or something along those lines), and cut twice the
material in half the time! We can then unfold the blanket, fold it over
so that both the long sides meet on one side...
...and cut the yoke and arm pieces.
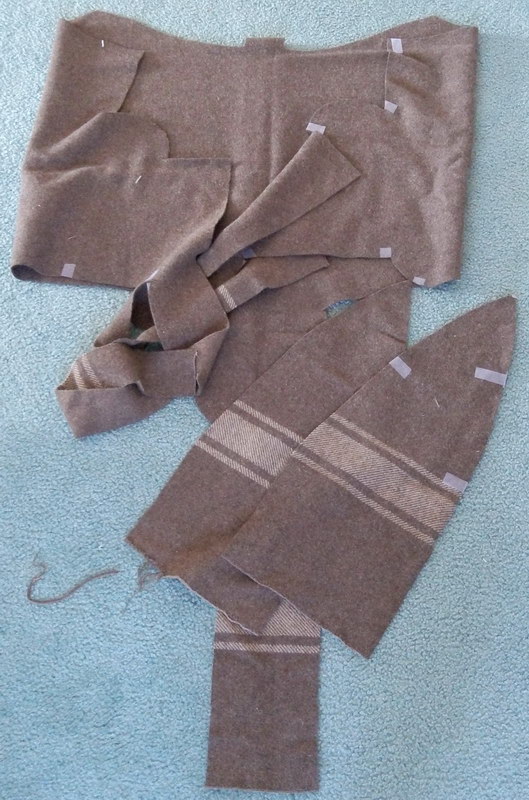
Now we have a larger leftover piece that we can use to make more stuff! Take pride in yourself for not creating waste, but an opportunity to utilize waste!
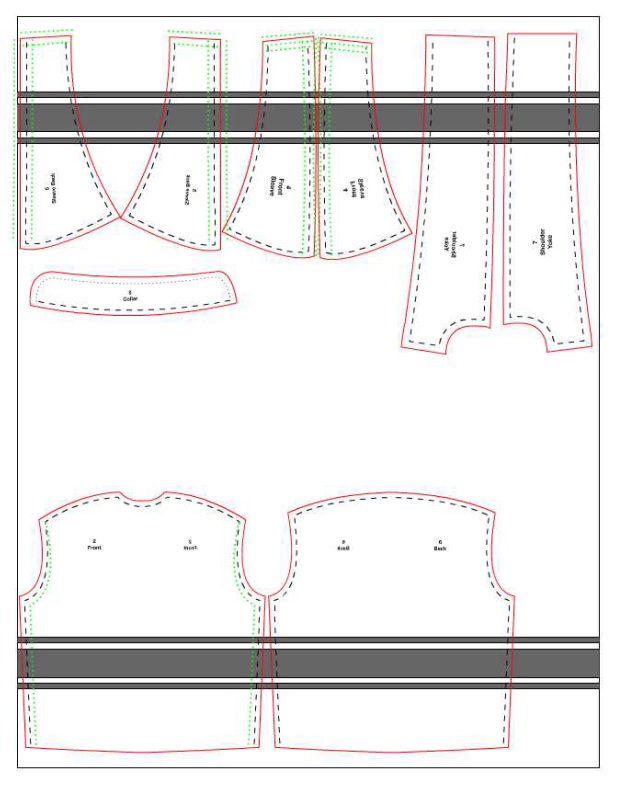
Let's get our numbers for a typical 5'8" - 6'1" human. We'll show how to adjust for size a little later on.
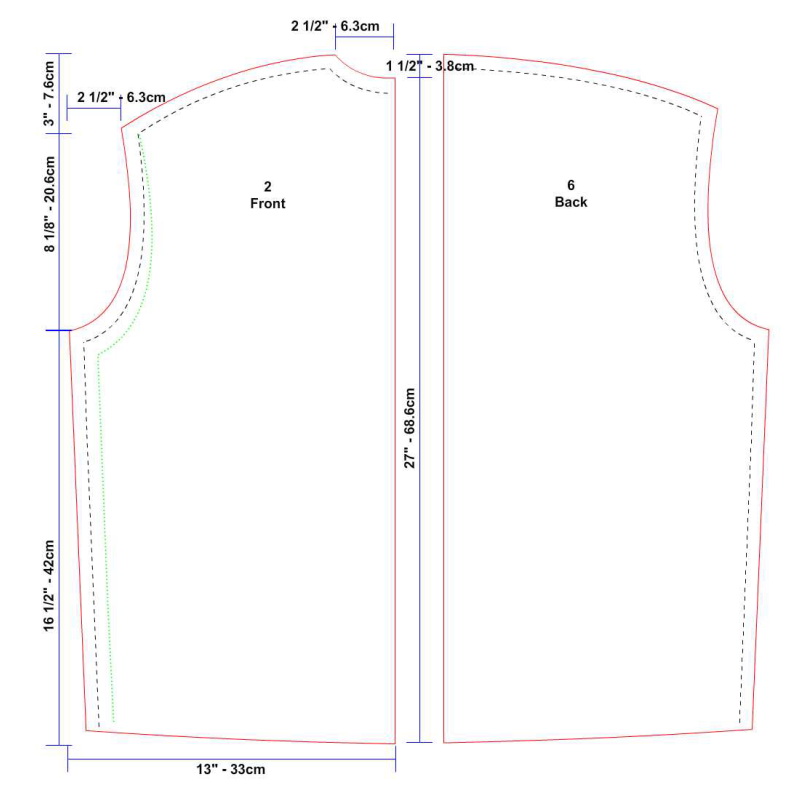
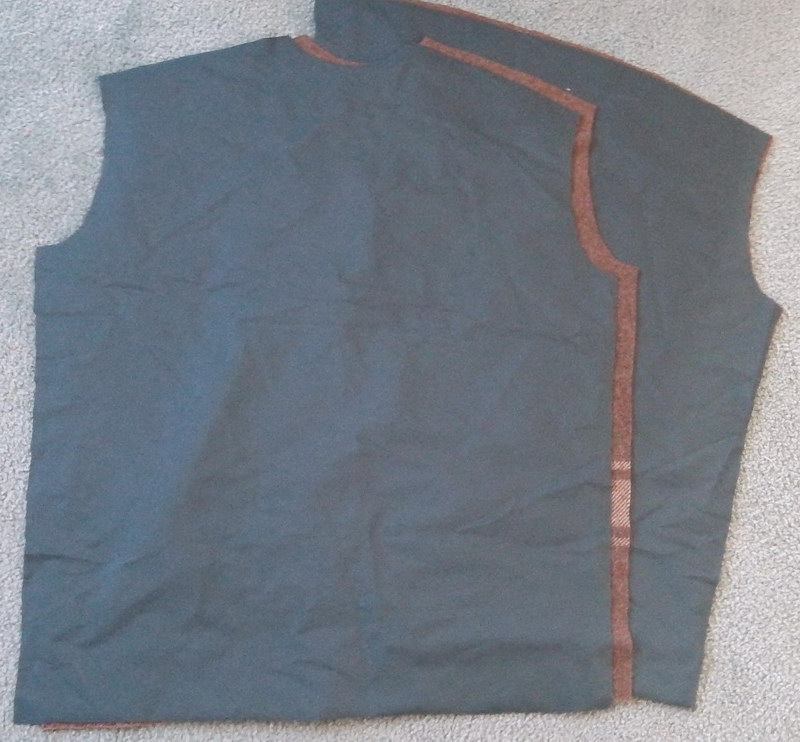
The RED lines are the template cut lines. The BLACK DASH lines are the sewing lines (5/8" inset from cut lines). The GREEN DOTTED lines are sizing adjustment lines.
This template shows BOTH the
front and back panels. The center line (27"/68.6cm) is a fold line. A
fold line is the center of the panel when layed out open. When folded,
you can only see one half of the panel. The fold line DOES NOT GET CUT.
It represents the centerline of the panel folded over to create the
final mirror image. When we make our templates, they will be layed out
on a folded piece of material with the template foldline matching the
material fold. When the material is unfolded it will be a complete
panel (and hopefully a mirror image on both sides. I cannot emphasize
the importance of the old carpenters adage.... "Measure twice. Cut once".
If you have any questions on layout semantics, please email me and i'll respond as quickly as possible.
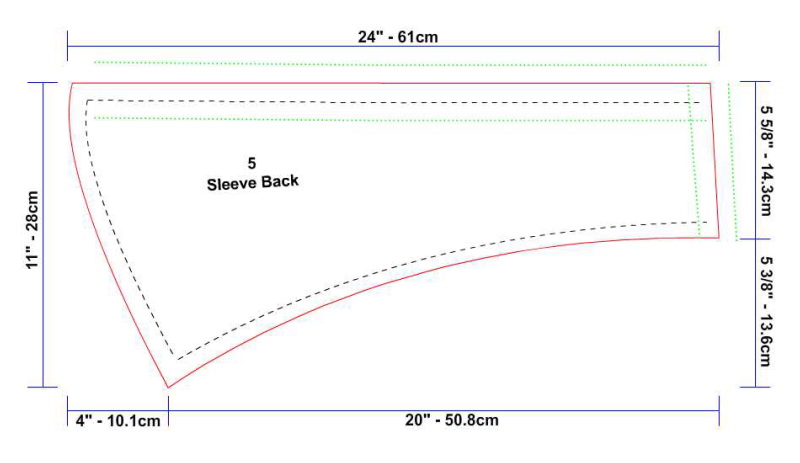
This is the layout template for the BACK SLEEVE which attaches to the underside of the yoke. You will need to cut 2 of these. There are no fold lines.

Layout template FRONT SLEEVE. You will need 2 of these.
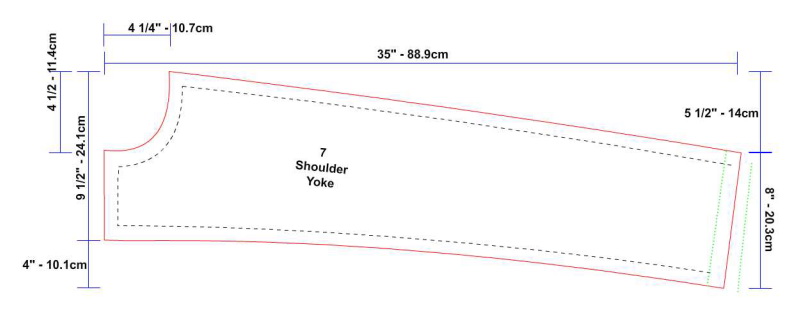
This is the layout template for the YOKE. You will need 2 of these. NOTE: there are no adjustments necessary to change the size of the final article other than length.
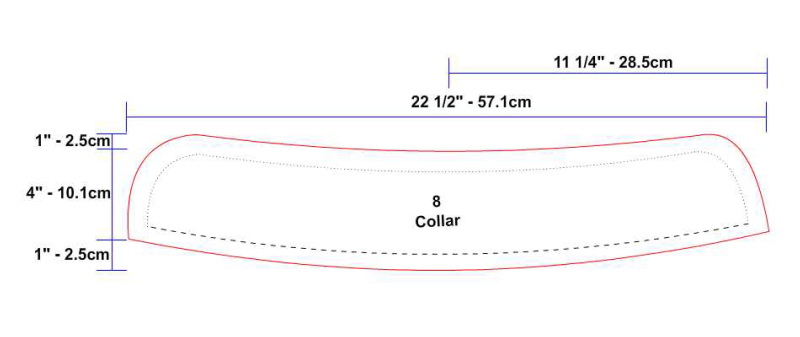
This is the Standup Collar (Mandarin). You will need 2 of these. If
you are privy to discomfort with wool on your neck, a substitute of
polar fleece or other material can be used as ONE of the collar panels.
***Let's talk about resizing the patterns.
The GREEN DOTTED lines are adjustment lines. By cutting more or less,
we can change the overall pattern to better match your size. The cut on
this jacket is loose to begin with and allows us to taylor the sizing
while we are actually assembling the panels. If your frame is smaller
than shown, removing 1/2" (or more) from the pattern cutlines is
suggested. If your body size is larger or taller you may want to add
1/2" (or more). For those that fall within the smaller frame category,
i highly recommend that you cut the panels out as show above and then
cut a 1/2" ONLY from the sides with green dots.
A 1/2" should equate to 2" in height when cut from sides that are
parallel to the ground (i.e.- cuffs on arm panels and yoke, lower hem
on body panels). Your breadth/width of your torso and arms can be
adjusted by removing materials perpendicular to the ground.
Tall and large people can do the opposite by adding if necessary.
I've had this jacket on people that are 6'4" and it fit them perfectly
on the arms but the torso seemed tight. So, it's better to have a
little extra, to not only accomodate extra layers, but also to work
with while sewing. we can always sew the seam in a little further than
5/8" (the standard by which i do all of my clothing layouts) and have
it fit smaller... allowing us to trim off the excess later. Remember
you can't add to the material once it's cut!
Fear not! You'll do just fine ;)
A strange example of resizing pains:
I'm 6'1" but i have a 6'6" arm span (cue the gorilla jokes). I
lengthened the sleeve lengths on all the arm patterns to compensate for
this. Following the algebraic rule of 'what you do to one side you must
do to the other' i also added extra to the lower hem so that the arms
were even with it. This worked out in theory and application, but for
some the hem might have been too long and posed a problem trying to get
to the top button of their pants!
Women also need to make compensations in the areas of the hips and
upper torso. For most women, this pattern will work perfectly, but if
you have a 44DD chest size, you'll have to make the front and back body
panels larger. By coincidence, enlarging the body panels fixes issues with hips/waist resizing.
Make a mock-up to be on the safe side. Yes, it will not be as bulky to
compensate for underlayers. Yes, you will want to take off/add on
more... Don't make big changes. less is more!
WAIT!
Before you get all excited, we still have to cut the same size and
quantity of panels for our liner (optional) and the body panels and
yoke of our breathable barrier.
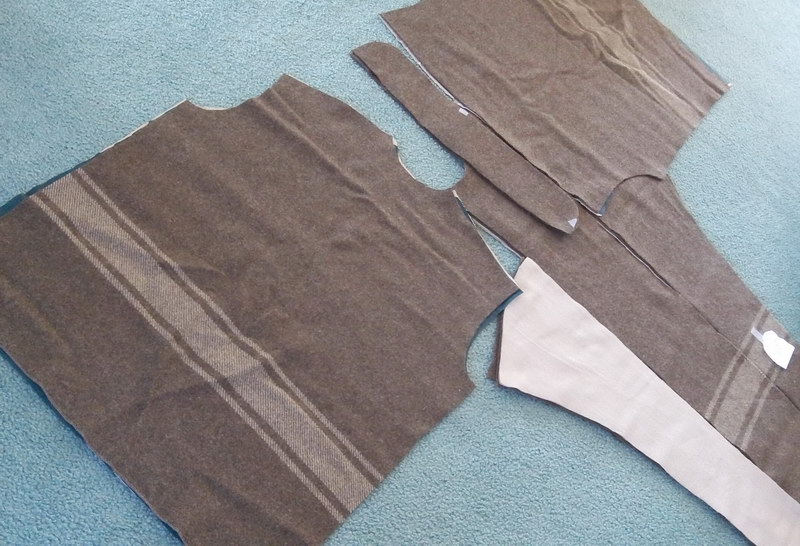
So, let's cut the the front and back body panels and yoke.
Use the wool body panels as a template to cut out the laminate panels.
Perfectly matched. We
are going to use the hot seam tape to fasten these to each other to
keep them from moving around when we sew.
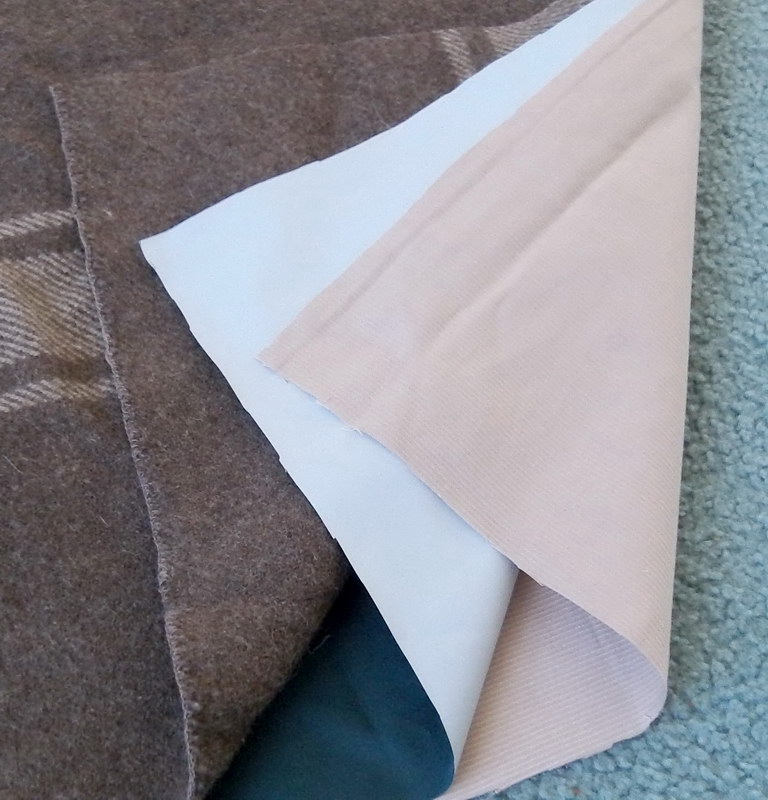
I chose to use a corduroy rib material for my liner. They will all line
up in this order when the anorak is complete. The laminates rubbery
side is facing the liner now, but later, it will be reversed so the
green side is inward.
For a final count, I have 3 Front body panels, 3 Back body panels, 3
Right Yoke panels, 3 Left Yoke panels, 2 Right Front Arm panels, 2 Left
Front Arm Panels, 2 Right Back Arm Panels, 2 Left Back Arm panels, and
2 Collar panels. Your version may have different combinations if you
chose to forgo the liner or possibly the laminate.
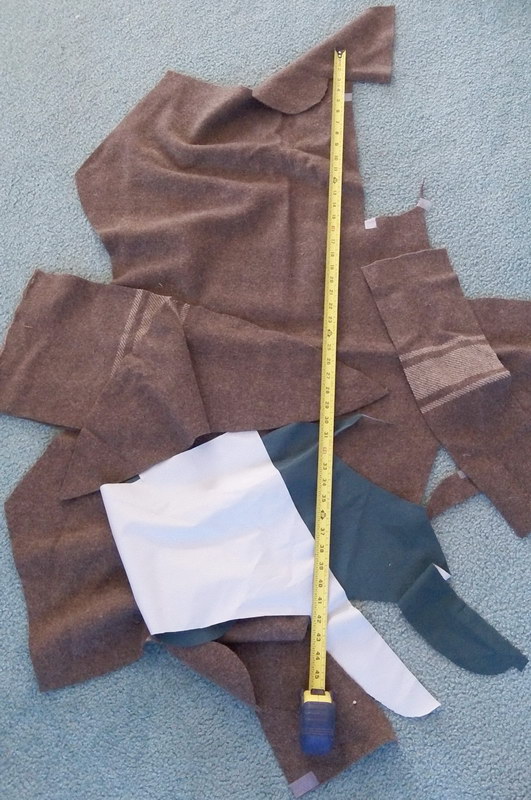
Scraps you say? What scraps? There's enough leftover to make a few hats and some mitten liners!
Now we can start...
Assembling Pieces >
______________________
MENU:
Jackets
and Pullovers
Hats and Headbands
Mittens
Bags and Cases
Sheaths and Knives
Miscellaneous
HOME
omnabashi@gmx.com
