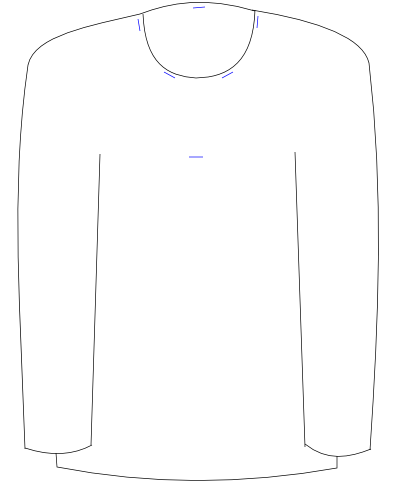
Our liner will attach to the shell at 5 points (right cuff, left cuff, collar, chestline, and lower hem). Let's stuff the liner in the shell and see what we've got.
Wait... There's an easier way. Put the liner on and then put the shell on over it! Then take both off together.
While you are wearing both, snug up the sleeves, take out the twists, and give a couple 'body' shakes to let everything settle in.
Unfortunately, the photos and illustrations are far a few between on this page. I hate to tell you this, but the next pages are going to be the most time consuming and frustrating out of this entire 'how-to'.

Doing my best to improvise on the illustrations (Forget theblue bar
tack in the chest area) ... We need to tack a few places to keep the
liner from moving. Line up the liner with the wool shell by overlaying
the seam of the liners yoke with the seam of the shells yoke. Use the
original stitches and NOT THE TOPSTITCHES to align. Tack about 1/2' in
from edge. It can be directly on top of the yoke stitches or a little
to the sides... it makes no difference.
Now, pull the neckline apart with your thumbs, making sure the
materials are lining up everywhere, and tack in 3-4 more places to keep
the neck areas locked together. Your seams on both the shell and liner
should match up pretty close. If not...
- Put one thumb on the yoke tack, put the other thumb at the front of
the jacket (near where your throat would be) and pull apart.
- Put a tack at the throat area in the front.
- Half way between the back and front tacks on the right side, put a tack. do the same for the left side.
You may have small amount of difference between the circumference of
the shell collar and the liner collar areas. No worries. This will all
be fixed when we add the collar.
Let's find the largest, flattest surface near us and lay the jacket out
as flat as possible (floor). Tease the jacket so that there are no
folds inside or out. Move your hands into the sleeves and expand them
while pulling out towards the cuff. Make sure side seams are even
and not twisted. Verify that the seams of both the liner and shell line
up everywhere. We're going to cut the neckline down toward our chest.
We want this to be as centered and straight as an arrow.
If it's off by any great margin, your placquard (the area where we are
going to put the toggles/buttons) will not only look bad, it will make
the jacket feel odd when wearing.
Simply put, It should be laid out like the smoothest 'T'.

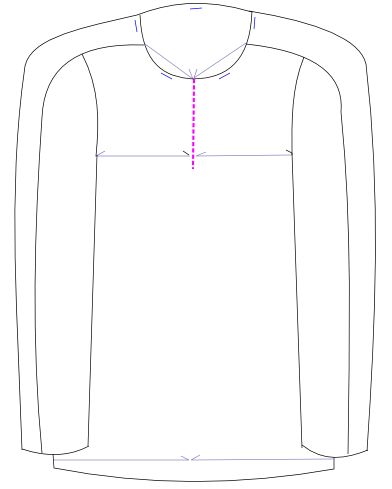
As illustrated, the Pink dashed line represents our proposed cutline. We need to find the centerline of the front to make a nice straight cut.
If we measure from the armpits and divide by 2 we can find one of the centerpoints to use.
If we measure from the Side body seams and divide by 2 we can get another centerpoint.
If we connect these centerpoints and along the length of the body, we
can find the centerline, and ultimately, the point on the neckline
where we want to start our cut!
Now, how far down the chest do we want to take this? I've gone down to
a perpendicular to an invisible line connecting the armpits... About
8-9" and a little above the plexus. You may decide that you want as
little as 5" (uses less toggles, slightly warmer in chest area) or as
much as 14" (might as well go with a jacket). Theoretically, you could
cut the centerline all the way down to the hem, load up 10 toggles and
make this into a full opening jacket. This design is more
oriented towards an anorak, and as such it doesn't make too many
concessions for guaranteeing comfort when taken outside of the realm of
this guide. If you would like to convert this into a jacket, you'll
find other tutorials here to make your jacket dreams possible.
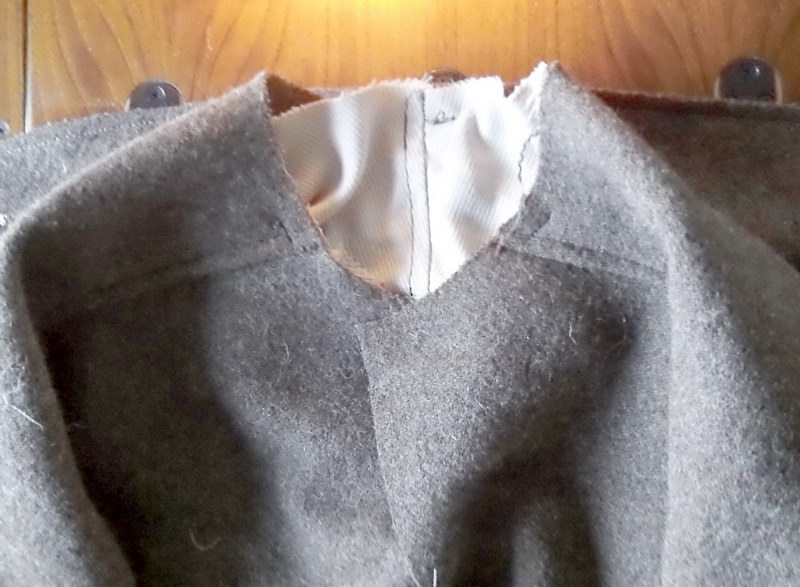
Let's cut about 8" down for starters and then try it on and see what we think.

A photo of the cut. Doesn't look like a whole lot at the moment. Looks
like it needs more depth. After you put it on and see how far the yoke
drapes over your shoulders, you'll see that this is probably the best
distance to have as we finish.
Let's not get to far ahead, we have to...
Design and build the collar >
______________________
MENU:
Jackets
and Pullovers
Hats and Headbands
Mittens
Bags and Cases
Sheaths and Knives
Miscellaneous
HOME
omnabashi@gmx.com


